Configure a safe connection to D365FO in OneBox Certificate reneval after expire
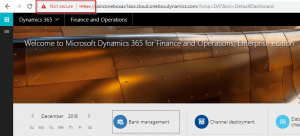
This article will tell you how to get rid of annoying “Not secure” message in the URL line when connected to Dynamics 365 for Finance and Operations in a local development environment (OneBox). You’ll learn why this happens and how to fix it!
Here’s why it happens
The reason lies in the fact that the site certificate is not compliant with the latest security standards. Chrome therefore treats it as invalid, while IE is not so strict. For Chrome 58 and later, only the subjectAlternativeName extension, not commonName, is used to match the domain name and site certificate. There was a registry quick fix for that, but it worked only up to the version 65.
Here’s how to fix it
You have to issue a new self-signed certificate for *.cloud.onebox.dynamics.com and change the web site binding settings to use it.
Step 1: Create a new self-signed certificate
Run the following Power Shell command (Run as Administrator):
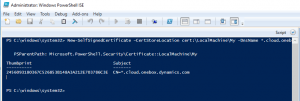
New-SelfSignedCertificate -Subject "CN=*.cloud.onebox.dynamics.com,O=Microsoft Corporation,L=Redmond,S=WA,C=US" -DnsName "*.cloud.onebox.dynamics.com", "usnconeboxax1ecom.cloud.onebox.dynamics.com", "usnconeboxax1pos.cloud.onebox.dynamics.com", "usnconeboxax1ret.cloud.onebox.dynamics.com" -CertStoreLocation "cert:\LocalMachine\My" -KeyUsage DataEncipherment, KeyEncipherment, DigitalSignature -HashAlgorithm "SHA384" -KeyAlgorithm RSA -KeyLength 2048 -NotAfter (Get-Date).AddYears(5)
This would create a new certificate, which has been set to expire in 5 years:
Step 2: Copy the new certificate to the folder where trusted certificates are stored
Open Manage computer certificates (certlm). Newly generated certificate can be found in Personal\Certificates folder. It has the same name as the old one, but different expiration date. Now copy and paste the new certificate to the Trusted Root Certification Authorities\Certificates folder.
Step 3: Bind the new certificate with D365FO
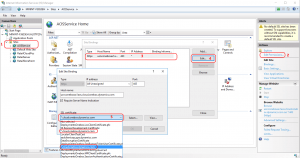
Open Internet Information Services (IIS) Manager. Now navigate to the AOSService site (1), click the Bindigs link on the right (2) and select the host name (3) and then click the Edit button (4). The Edit Site Binding dialog opens. Open the SSL certificate drop-down selection box (5). You will see two certificates with the same name (*.cloud.onebox.dynamics.com). The one selected is probably the old one. Select the other one. Then click the View button to inspect, if you really selected the right certificate (by checking the expiry date, for example).
Click Yes if the system asks for confirmation to change the certificate for other related sites as well.
Close all open dialogs. Restart the AOSService (Click the Restart link under Manage Websites in the vertical pane on the right).
Step 4: Test if the connection to D365FO is treated as safe in Chrome
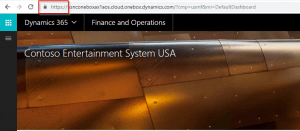
Restart Chrome and navigate to D365FO. The connection should now be safe.


Comments
Post a Comment